Chocolate Love

No lumps. No bumps. Just creamy, dreamy bittersweet bliss.

What can I say? I screwed up.

Twice I managed to destroy my Mile-High Chocolate Cream Pie / Valentine’s Day post. But here we go. Again. I won’t even dare to hope the third time will be the charm. I’ll post and never look back, won’t go back even for a quick edit or two.

I’ll try not to, anyway.
In previous posts, I said a lot of lovely things about love, trying my best not to sound too schmaltzy. Forget all that. I no longer have the words, and, anyway, this is all you really need to know: eat pie; love the one you’re with; live together, die alone (gratuitous ‘Lost’ reference).

If you love chocolate pudding, you will love this pie. It is a richer, more adult version of what you probably ate as a kid. Enjoy.

Mile-High Chocolate Cream Pie 
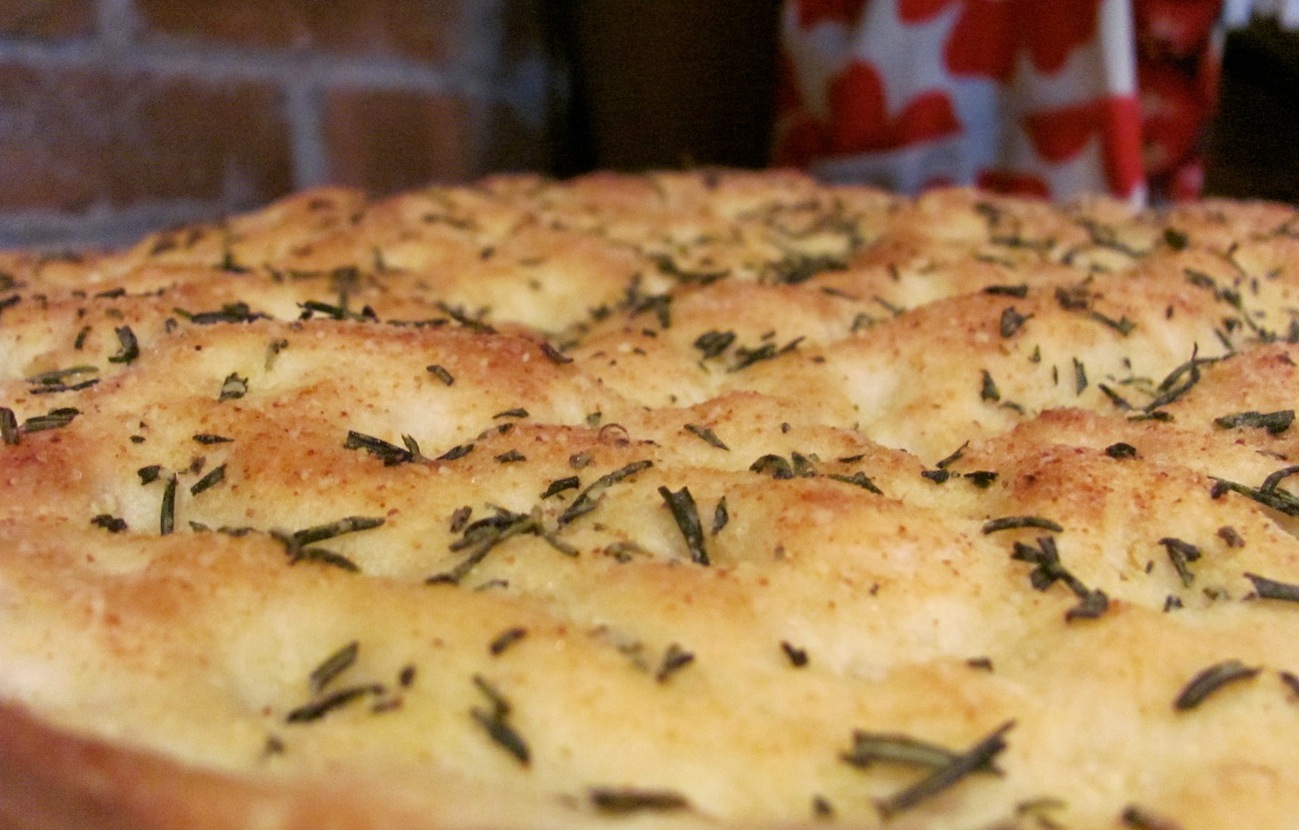
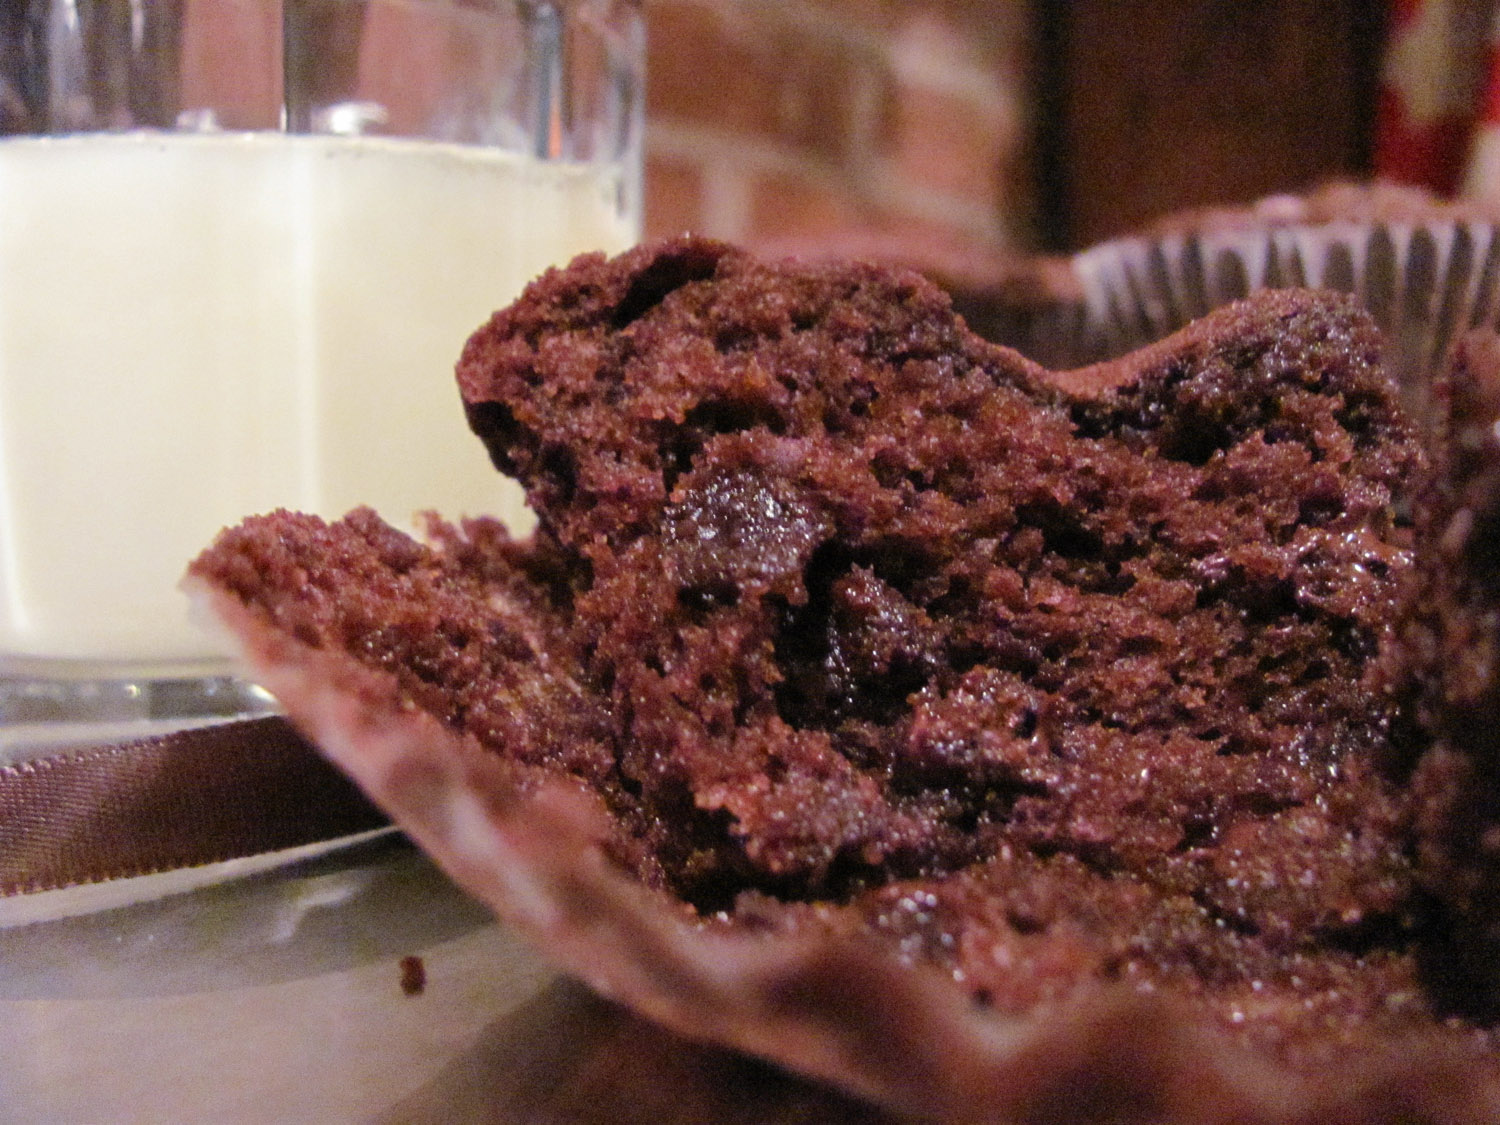
(Adapted from a recipe in Gourmet magazine / February 2004, my version shows off my homemade chocolate wafer cookies, beaten senseless at the altar of pie crust. Keep in mind, though, the cookies are darkly delicious on their own with a tall glass of cold milk [you will have extra wafers].)


Chocolate wafers (for the cookie crust; if you prefer, use store-bought chocolate wafers or graham crackers):
1 stick salted butter, softened
3/4 cup packed brown sugar
1/2 cup granulated sugar
1 teaspoon vanilla extract
3-4 tablespoons skim milk

1 cup plus 3 tablespoons all-purpose flour
1/2 cup unsweetened cocoa powder
1/4 teaspoon baking soda
scant 1/4 teaspoon salt

In a small bowl, whisk together flour, cocoa powder, baking soda and salt. Set aside.

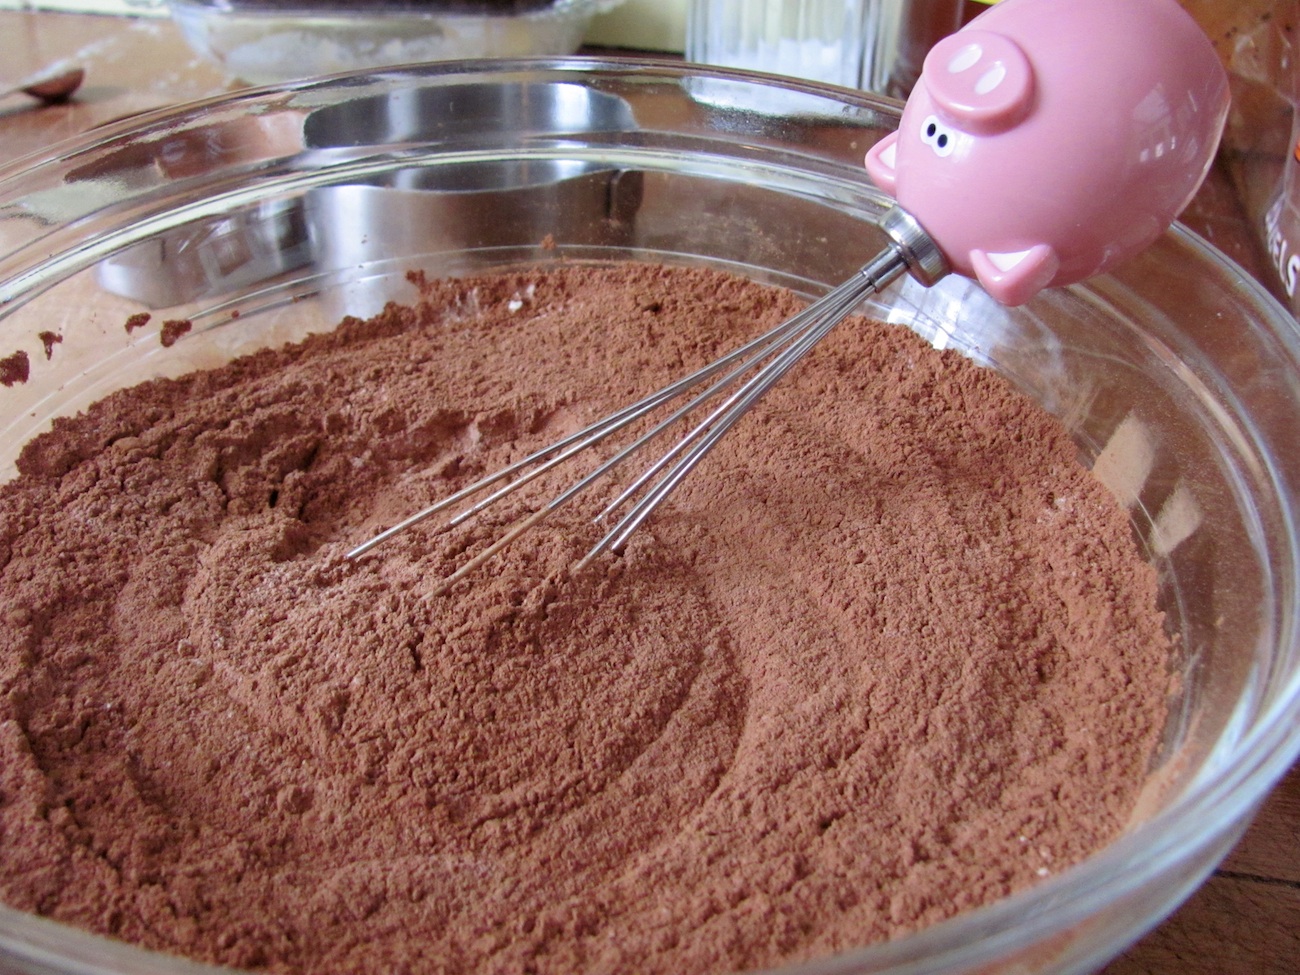
Putting the pig to work.

Beat softened butter until creamy; add sugars and beat on high speed until incorporated and fluffy.
Turn mixer to low; beat in milk and gradually add flour mixture 1/4 cup at a time.
Stop mixing once flour is fully incorporated and dough has come together.
Place dough on sheet of waxed paper or plastic wrap and form into a log, the diameter of which will be the approximate width of your cookies once sliced.
Refrigerate log for about an hour.
Position racks in upper and lower thirds of oven. Preheat oven to 350 degrees. Lightly grease two baking sheets.
Slice dough log into 1/4-inch-thick rounds. Place on cookie sheets.
Bake in preheated oven for 10-13 minutes, depending on the thickness of your dough. Rotate baking sheets at about the 6-minute mark.
Transfer cookies to wire racks to cool completely.
Crust:
1 1/3 cups chocolate wafer crumbs (from homemade wafers —recipe above — or store-bought; crush cookies in food processor or place in food-storage bag and beat with rolling pin.)
1/4 cup sugar
5 tablespoons butter, melted

Filling:
2/3 cup granulated sugar
4 large egg yolks (I save the whites for a breakfast sandwich)
1/4 cup cornstarch
1/2 teaspoon salt
3 cups whole milk (do not use low-fat or skim)
5 ounces bittersweet chocolate (60-70 percent cacao), melted
2 ounces unsweetened chocolate, melted
2 tablespoons butter, softened
1 teaspoon vanilla
Topping:
1 cup heavy cream
1 heaping tablespoon sugar (or less; the pie is rich, and I find too-sweet cream overkill)
For the crust:
Preheat oven to 350 degrees (rack should be in middle position).
With fork, mix wafer crumbs with sugar and melted butter until fully incorporated.
Press crumb mixture into 9-inch pie plate, being sure to make it at least 2/3 of the way up the side.
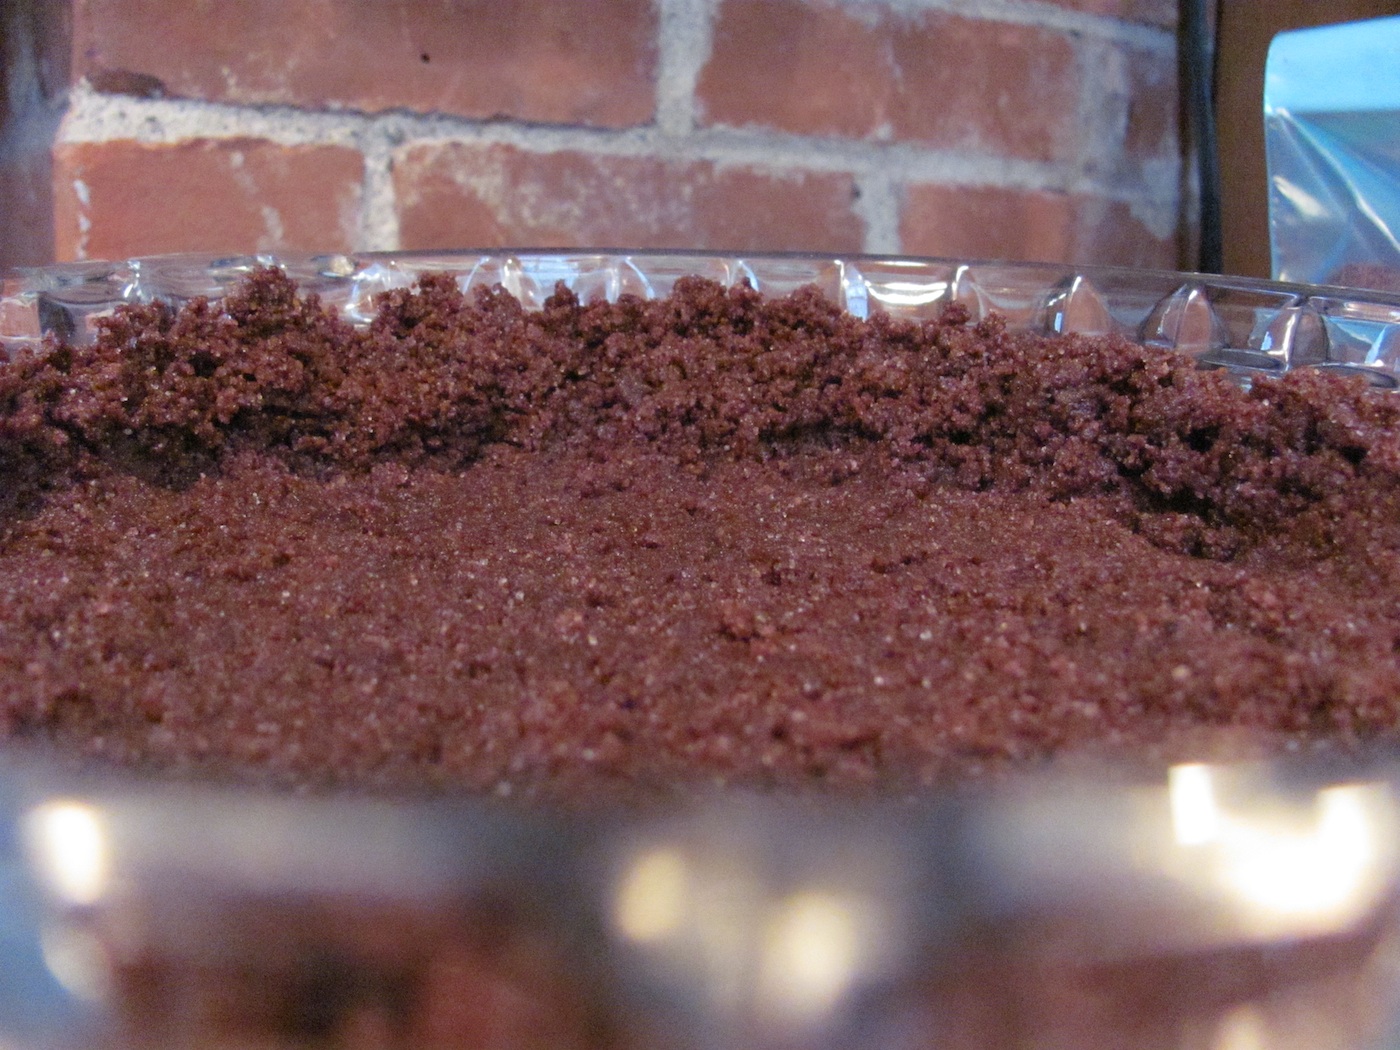
Bake in preheated oven for about 15 minutes. Let cool completely on wire rack while you make the filling.
For the filling:
In a large heavy-bottom saucepan, whisk together egg yolks, sugar, cornstarch and salt (do not turn on burner for this step).
Slowly add milk, whisking continuously while you turn the burner on medium heat.
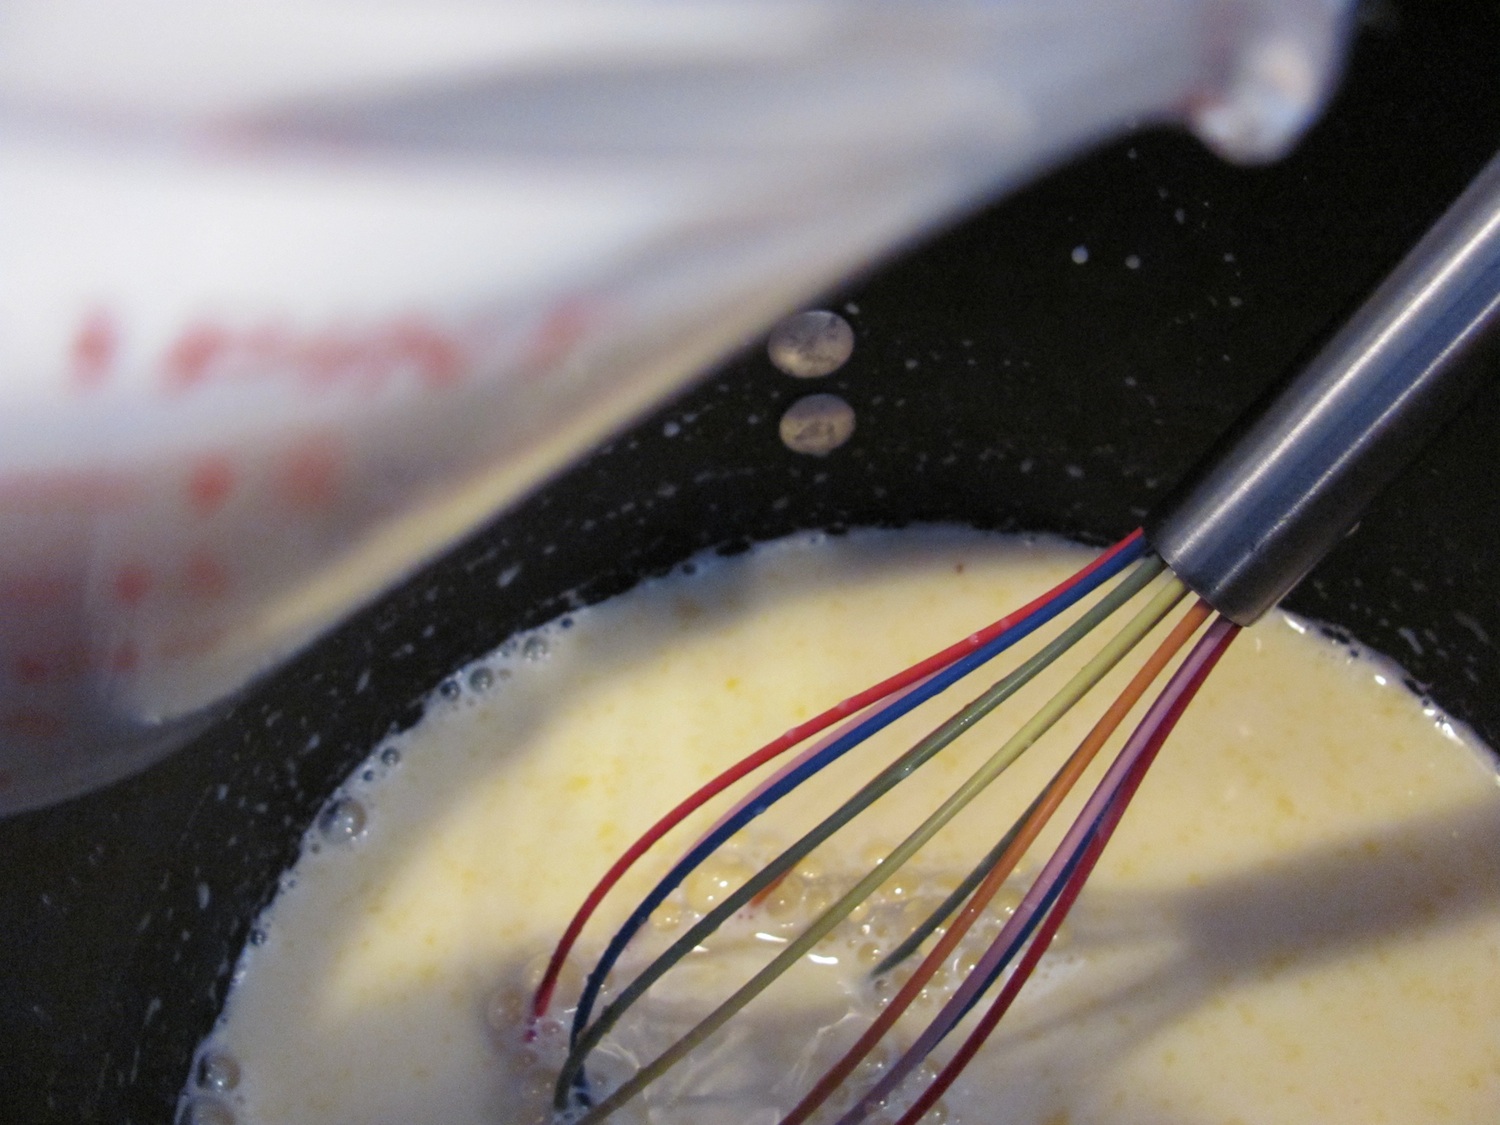
Bring to boil, whisking all the while, then reduce heat and simmer for about a minute, still whisking passionately. (I’m sure you’ve caught on to the importance of nonstop whisking. Whisk like you’ve never whisked before. If you do, the promise of creamy, lump-free decadence is yours.)
The filling should be thick. Take off the heat and transfer to large bowl. (At this point, Gourmet instructs one to push the filling through a fine-mesh sieve; well, this one couldn’t find her sieve. I momentarily considered forcing it through my flour sifter but upon further reflection smartly decided against it. After all, I whisked like the dickens and felt confident my custard was lump and bump free. Upon feasting later, I discovered I was right.)
Whisk in both chocolates, vanilla and softened butter, mixing thoroughly.
Cover surface of filling with greased round of wax paper (to avoid formation of a funky skin) and let cool completely in the fridge (about 2 hours).
Spoon chilled filling into crust and refrigerate pie, 6 hours or overnight.
To serve:
When you can’t take it any longer, whip cream and sugar with electric mixer until fluffy. Top pie with cream and have at it.
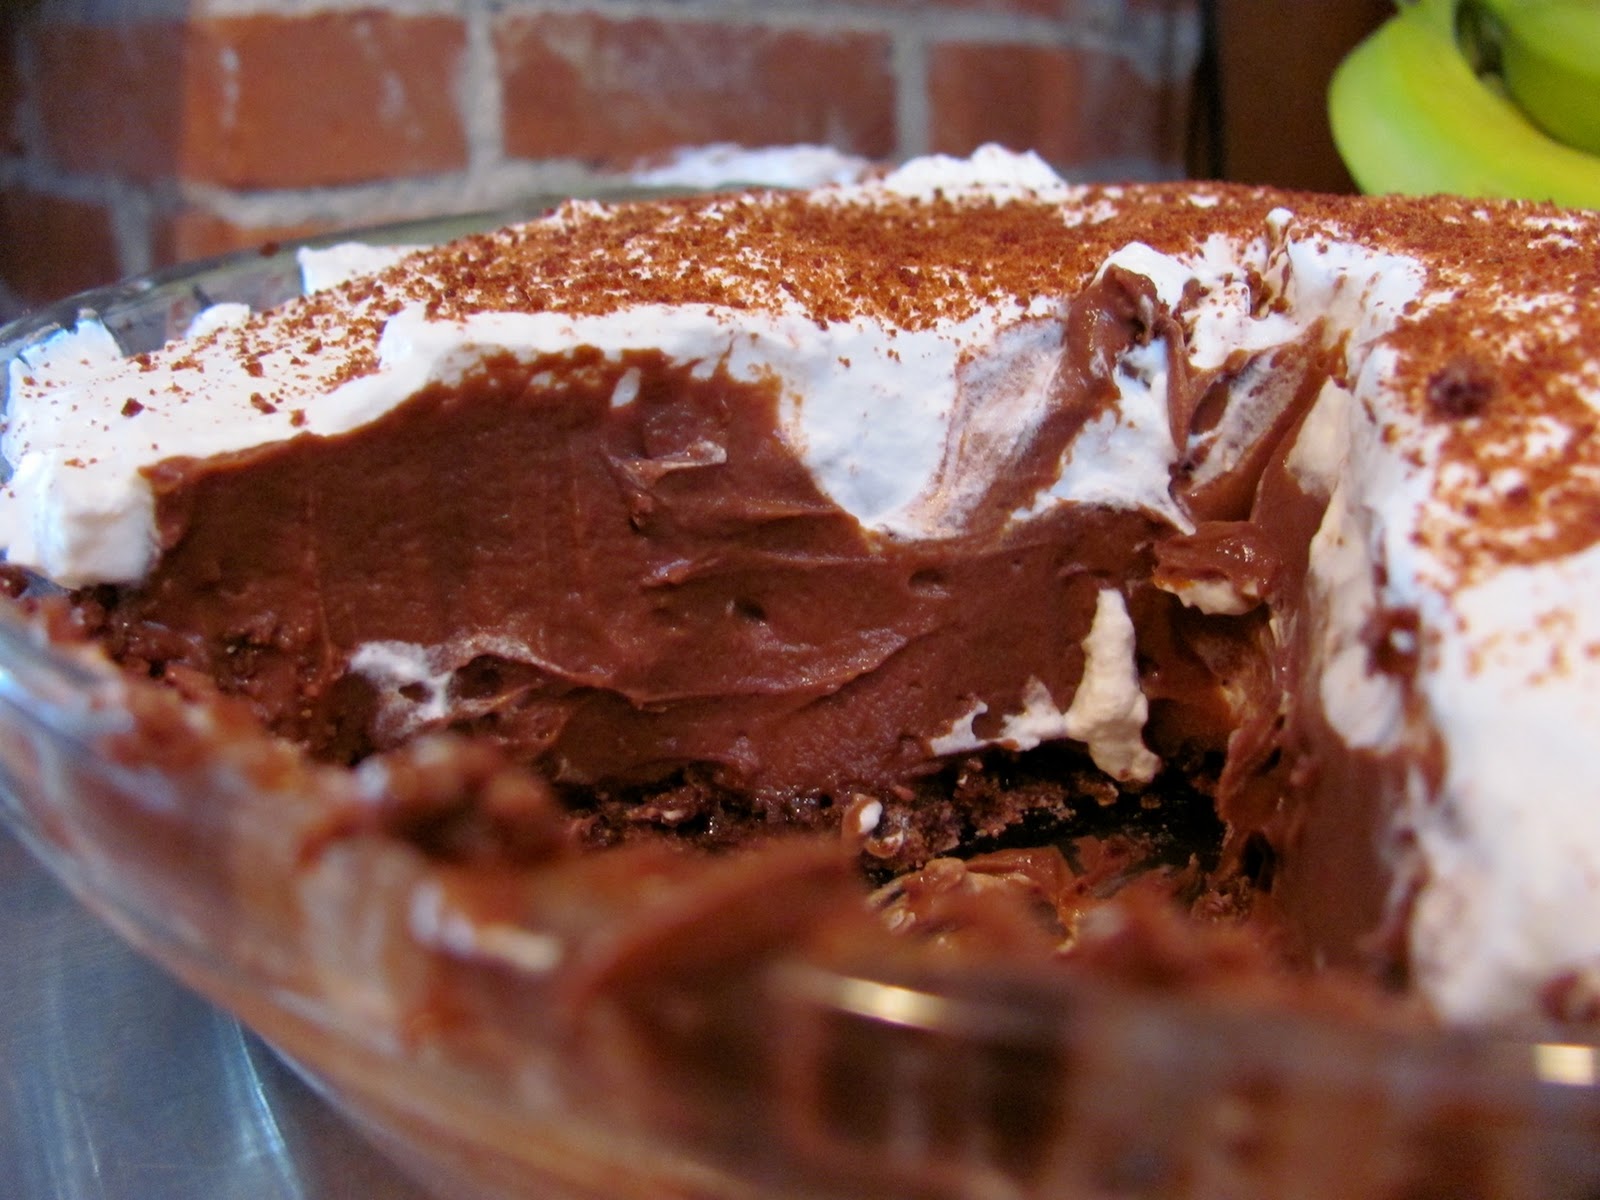
I had this for breakfast.

My Savory Valentine

Rosemary focaccia with garlic-infused olive oil, sea salt and a sprinkling of parm — soon to be pressed either side of grilled chicken, pesto and smoked gouda.

Not everyone has a sweet tooth. Not everyone likes chocolate. Not everyone raids the local CVS for 70-percent-off candy the day after Valentine’s, Easter, Halloween. 
People have told me these things. And while I don’t necessarily believe them, I play along. After all, my love of food has no borders — well, it may stop dead in its tracks faced with cauliflower, but even then it may be turned on if a nice Indian curry is brought into the mix — and my kitchen doings aren’t all about the sweet stuff. In that spirit, bolstered by the knowledge that I’ll be making a mile-high chocolate cream pie for Valentine’s Day, I played to all the savory teeth out there and baked off some rosemary focaccia with garlic-infused olive oil, sea salt and parmesan cheese.

Now, I do not claim to be a focaccia expert (though I’ve made it several times). My forefathers and mothers did not make focaccia in their Swedish, Irish and German kitchens (Well, maybe they did. Who am I to say?). But focaccia, my point is, has to be one of the easiest breads to make. And so satisfying. Not to mention amenable to any changes/additions your heart may desire or your pantry/fridge may necessitate (sea salt and olive oil may be all you want, but pancetta and caramelized onions have made their way onto my focaccia and I’ve never regretted their arrival). Have it your way. My way usually involves rosemary, because I have this wild thing taking over our home:
Yes, there is someone playing a Wii behind the rosemary.


At our house, we like to eat focaccia warm, fresh out of the oven; as the foundation of our sandwiches, slathered with pesto; or in hearty slabs while we contemplate what to make for dinner.

Rosemary Focaccia with Garlic-Infused Olive Oil, Sea Salt and Parm
(makes one 11×17-inch flatbread)
dough:
2 teaspoons granulated sugar or honey
1 cup plus 2-3 tablespoons warm water
2 tablespoons olive oil
4 cups all-purpose flour
1/2 teaspoon salt
1 1/2 teaspoons instant dry yeast (see my rant about instant dry yeast — still not over it)
topping:
2-3 tablespoons olive oil (mine is infused with garlic, but regular is fine, of course — you can always rub the dough down with raw garlic or sprinkle it with granulated garlic, if that’s what you have handy)
generous shower of sea salt (to taste)
rosemary (to taste — I used 3-4 large sprigs), coarsely chopped
2-3 tablespoons freshly grated parmesan cheese

In the bowl of a stand mixer (or in a large mixing bowl), stir together the sugar, 3/4 cup water, 2 tablespoons olive oil and salt.

In a separate bowl, mix flour with instant dry yeast. Let sit for about 30 seconds.

Add flour/yeast combo in batches to other ingredients, alternating with remaining water, mixing as you go. Work it until dough neatly clears sides of the bowl.

Switch to dough hook and knead for about a minute (or knead by hand on lightly floured board).

Transfer dough to lightly oiled bowl, turning to coat. Cover with a damp cloth and let rise in a warm place for about 30 minutes.

Preheat oven to 475 degrees. Lightly grease a baker’s half-sheet pan (11×17 inches).

Punch down dough, kneading briefly, then place it on the prepared pan, pressing and patting it to fill the pan.

Now the fun part: use your fingertips to make dimples (indentations) all over the dough. (I read online that some people actually have a kitchen tool called a “dimpler.” I love it for its name alone, but I won’t be buying one. My fingers are my dimpling agents.)

Brush dimpled dough with olive oil. Liberally sprinkle with sea salt, garlic, chopped rosemary and grated parmesan.

I am a lover of all things dimpled.

Bake in preheated oven for 12-15 minutes, rotating pan at the 7-minute mark.

Eat as is, warm from the oven, or as sandwich bread. (I couldn’t help myself and cut some of the flatbread into hearts, as seen in the opening photo, but I understand if that’s too adorable for you.)

Happy Snow Day To Me

Triple Chocolate Babycake studded with bittersweet chunks

Today is a day for celebration. I did my taxes (before April 14 for the first time ever in my life). I shoveled (a lot). I was able to start the car (eventually). And while I’ve been trying to lay off chocolate in anticipation of the dark things I intend to bake for Valentine’s Day, I decided there was no harm in enjoying a few Triple Chocolate Babycakes on a blustery day of such fine accomplishment.
These cakes are small and unadorned for a reason: they are meltingly rich and a few bites will do you (not that I am anyone to judge responsible chocolate intake), and frosting would be unwelcome overkill. 
I enjoyed mine with an icy cold glass of milk, shared a few, and froze the rest.
The moist and gooey insides

Triple Chocolate Babycakes
1/2 cup (1 stick) butter, softened
1 cup packed light brown sugar
3 ounces unsweetened chocolate, chopped (I used 3/4 of a Ghirardelli 70% cacao bittersweet baking bar)
6 ounces semisweet chocolate, coarsely chopped (chips work fine, too, of course)
6 ounces bittersweet chocolate (60% cacao), coarsely chopped (chips, again, are fine)
2 large eggs
1 teaspoon vanilla
2/3 cup milk
1 cup all-purpose flour
1/2 teaspoon baking soda
1/4 teaspoon salt (if you use unsalted butter, use a 1/2 teaspoon salt)
Preheat oven to 350 degrees. Position racks in upper and lower thirds of oven. Line or grease muffin tins (I used 2 standard tins — one 12-cup and one 6-cup — but filled only 16 cups).
Whisk flour, salt and baking soda together. Set aside.
Melt unsweetened chocolate and 1/2 cup of the semisweet chunks in microwave or double boiler. Set aside to cool slightly.
Cream butter and sugar until fluffy. Add vanilla and eggs, one at a time, until fully incorporated.
Add melted chocolate to butter/sugar/egg mixture, mixing well.
Add flour mixture and milk to batter, alternating in a few batches. 
Fold in the bittersweet chunks and remaining semisweet chunks.
Fill prepared muffins cups about 3/4 of the way.
Bake in preheated oven for 24-26 minutes, rotating pans halfway through baking. (You can test for doneness with a cake tester / toothpick, but try to avoid any molten chunks that might throw you off. Good luck. … Really, though, the cakes will set up nicely and lose that wet look when fully cooked. Also, it’s a good rule of thumb to check them when you smell them.) 
Cool in pans about 15 minutes before releasing to wire racks to continue cooling.
Serve warm or cooled, as is or with a scoop of your favorite vanilla bean ice cream.
(Recipe makes 14-16 Triple Chocolate Babycakes, depending on the size of the tins. Babycakes freeze well.)

Chili's BFF: Fresh, Warm Corn Muffins

Lightly sweetened with brown sugar …

Small-Batch Corn Muffins
(To sop up your chili, as promised.)
As much as I love corn muffins, I don’t want to be overrun by them. They have their place among the bagels, wheat bread, cardamom breadbanana pecan muffins, cakes, pies and cookies competing for my affections. That’s why this recipe is perfect for our household of two; it makes about six (6) standard-size muffins.

The wet:
1 egg, beaten
1/2 cup milk
2 tablespoons butter, melted
The dry:
1/2 cup cornmeal
1/2 cup all-purpose flour
2 tablespoons brown sugar
2 teaspoons baking powder
1/4 teaspoon salt
Preheat oven to 425 degrees. 
Line or grease a 6-cup standard-size muffin tin; if you’re using a bigger tin, fill the remaining cups with water about half-way.
Whisk dry ingredients together in large bowl.
Gently fold wet ingredients into dry, using as few strokes as possible, to combine.
Bake in preheated oven for 13-15 minutes. Serve warm with or without butter, honey, chili …

Chili Isn't 'Like Water for Chocolate'

Turkey chili for the masses

My craving for turkey chili this weekend and my desire to view “Like Water for Chocolate” for the 38th or so time since it was released in the 1990s really don’t have much to do with each other — other than the fact that I’m going to subject you to them both. And the fact that I plan to scarf down a bowl or two of the long-simmered goodness while I watch the best movie ever, nestled on the sofa in my orange flannel pajama pants.

If you haven’t seen “Like Water for Chocolate,” get thee to your favorite purveyor of films and prepare yourself to be wooed by a story of forbidden love, lust, sensual cooking, a naked horseback ride with a rebel leader, bitter sisterly rivalry (one’s overly flatulent, one’s all sugar and spice), a demonic mama and the dramatic consequences when one goes without satisfying a heart’s desire for far too long! (one of few exclamation points you will ever see me use)

I can’t wait to watch it. Again. Each time is like the first time. If you don’t believe me, listen to Playboy; the mag called it “erotic and delectable.”

Now on to the feasting portion of this evening’s entertainment. I made my go-to turkey and bean chili this afternoon (adapted from a recipe in the November 1999 issue of Bon Appetit) — it’s simmering on the stove as I write this —and corn muffins to help sop up the meat, the beans, the tomatoes swimming in their spicy — but not too spicy — bath.

This recipe is flexible. I try to balance my weekly intake of fat-laden baked goods by preparing dinners that are hearty but healthy and low-fat. If you prefer ground beef in your chili, make that substitution. If you like more heat, go for it. This recipe provides a good baseline.

I think these red bell peppers deserve a close-up, seeing as I paid $2.90 for two at the local grocer. 
Seems excessive, no?

Hearty Turkey Chili with Beans

1 teaspoon olive oil
1 large onion, diced
2 red bell peppers, diced
8 cloves garlic, minced (I like garlic; use less if you prefer)
2 pounds ground turkey (or other ground protein)
3 tablespoons chili powder
1 1/2 teaspoons cumin
1 1/2 teaspoons oregano
3 15-ounce cans kidney beans (or mix of kidney and black beans; I’ve also thrown in chickpeas on occasion), rinsed and drained
1 28-ounce can diced tomatoes, with their juice
3 cups chicken stock (I use homemade but low-sodium store-bought is fine)
1 smallish handful of chocolate chunks (I use bittersweet)
sea salt and fresh cracked pepper to taste
Heat dutch oven or other large heavy-bottom pot over medium-high flame. Saute onions, peppers and garlic in olive oil until soft. 
Turn heat to high and add ground turkey, breaking it up as it cooks; season with salt and cracked pepper. When browned, add cumin, chili powder and oregano; mix well. 
Cumin, chili powder and oregano at the ready

Add kidney beans, tomatoes, chicken stock and chocolate; stir to combine. Bring chili to a boil. Reduce heat and let chili simmer uncovered for 1 1/4 hours, stirring occasionally. Season to taste and serve with warm corn muffins.
(Recipe yields about 6 dinner-portion servings for robust eaters. Freezes well.)
Bringing it down to a simmer …

Crazy for Cardamom

Voluptuous cardamom-y goodness.

Once upon a time, in a world far less perfect than the one I currently inhabit, I baked this bread only around the holidays. I’ve changed my ways. There’s no wrong time for cardamom bread. I made three loaves last week, and we (all two of us) have demolished them. 
Cardamom bread is a good idea anytime: as a snack with or without butter; for breakfast as is or made into French toast; in the middle of the night, hunkered over a loaf in the dark. And remember, coffee loves cardamom bread. And cardamom bread loves coffee.
It’s a simple braided bread. Ingredients are below. I’ll be back later to add my method.
Cardamom Bread (1 loaf)
3/4 cup milk
1/4 cup (4 tablespoons) unsalted butter, cut into small chunks
1 large egg
1/3 cup granulated sugar
3/4 teaspoon salt
3 cups all-purpose flour (I use King Arthur’s)
3-4 teaspoons ground cardamom (this is a matter of personal preference; if you have whole cardamom pods, use 4 or 5 pods — remove seeds from pods and crush with a rolling pin)
2 teaspoons yeast
glaze:
1 large egg
1 tablespoon milk
a sprinkling of granulated sugar
It is now later.

(Truth time: I used instant dry yeast for this recipe. I had never used it before, so bear with me, but somehow the stuff ended up in our cart at a nearby wholesale warehouse establishment that will remain nameless. “Somehow” meaning that in my free-food-sample-induced craze while roaming the aisles, I blindly threw the jumbo pack into our otherwise well-thought-out mix of goods. And as it looks like instant dry yeast will be in my pantry for months, if not years, into the future, here’s to using it with a smile on my face.)
Combine butter cubes with milk and microwave for a minute (if no microwave, melt butter into milk in a saucepan over low heat). 
Add milk/butter combo to bowl of stand mixer fitted with the whisk attachment along with 1 egg, sugar, salt, cardamom and 1 cup flour. Mix until combined.
In separate bowl, mix instant dry yeast with remaining 2 cups flour (for 30 seconds, according to the Fleischmann’s package).
With mixer running, gradually scoop flour/yeast mixture into other ingredients to combine.
Switch to the dough hook and knead on low for about 4-5 minutes (or knead by hand —much more rewarding).
Place dough in a greased bowl (a deep one) and cover with plastic. Leave to rise at room temperature for 45 minutes to 1 hour. (My house averages about 55 degrees, so I cheated and left my dough to rise in a warm oven.)

Divide dough into 3 parts and roll into ropes. Place on a baking sheet, cover with a cloth and let rest for about 10 minutes.
Braid the dough, then let rise (covered) for another 45 minutes.
Whisk 1 egg with 1 tablespoon milk to make glaze; brush over braid. Sprinkle sugar over top. (You will have leftover glaze; go glaze something else.)
Bake in preheated 350-degree oven for 20 minutes or so. (Tap the bread with your finger; it is done when it sounds hollow.) 
Let cool completely on wire rack before slicing. 

(Gluttonous on occasion, never meaning any real harm, I sometimes convince myself that the bread is cool enough to have a go with me and my knife a wee bit prematurely. Nothing bad happens. We all enjoy ourselves.)

Residing at the Apex of the Muffin World

Bodacious beauties.

I need to stop making promises I can’t keep (or, at least, keep in a timely manner). The Little House project has to wait a few days, sadly, as I don’t have some key ingredients in my pantry. Namely lard, but give me a week or so.
What I did bake yesterday was my cardamom bread and today … Banana Pecan Muffins (adapted from a recipe by Beth Hensperger in “The Bread Bible”). I ate one muffin pre-shoveling duties, another one post-shoveling duties. Then I started to worry about further adding to the jelly belly. Anyway, I can’t get enough of these muffins with their crumbly tops. I had to freeze some just so I’d stop eating them, at least for the moment.

Banana Pecan Muffins

Crumble topping
1/2 cup sugar (I used granulated but brown would be lovely, too)
1/3 cup all-purpose flour
4 tablespoons cold unsalted butter (salted would be fine, really)

1 cup granulated sugar
1/2 cup vegetable oil
2 large eggs

3 super-ripe bananas
2 cups all-purpose flour
1 teaspoon baking powder
1 teaspoon baking soda
1/4 teaspoon salt
1/2 to 3/4 teaspoon ground cinnamon

3/4 cup pecans, chopped finely (read, to within an inch of their lives — my cohorts and I don’t like chunky nuts in our muffins; I pretty much ground mine in the food processor; do what you will)

Preheat oven to 375 degrees Fahrenheit. Grease, or line with papers, 12-cup standard muffin tin (I used paper liners as my pre-World War II muffin tin does not behave when it comes to releasing baked goods).

Mash your bananas, then mash them some more. Don’t worry about chunks, though; you want it chunky. Set bananas aside.

Prepare streusel topping: use a pastry blender, a fork or two knives to cut the cold butter into flour/sugar combo until you have a pebbly mixture. Set streusel topping aside.

Whisk sugar with oil until frothy. Add eggs; whisk till well combined. Set aside.

Whisk together dry ingredients (flour through cinnamon). GENTLY FOLD (yes, all caps is obnoxious and I don’t mean to yell, but it’s important to go easy; you don’t want to overwork your batter) your wet mixture, mashed bananas and ground pecans into your dry ingredients. Use as few strokes as possible to combine everything. It will be lumpy. This is good. Lumps are lovely.

Scoop batter into muffin tray, filling each cup to just about its top.

Place 1 tablespoon-ish of streusel topping on top of each.

Bake in preheated oven for 20-25 minutes. They are done when your cake tester / toothpick comes out clean when delicately plunged into center of one of the muffins.

Leave in pan to cool for five minutes before releasing muffins onto wire rack to cool some more. Eat as soon as your hands can handle the heat. So good. As much as I love a slathering of butter, these really don’t need it, but, again, do what you will.

Perfect Marriage: Cooking & Little House


The Little House Cookbook, in all its bright orange glory.

I have long been a fan of the “Little House On The Prairie” series (the books, not the show so much, but, despite that, I’ve probably seen every episode). Anyway, as a child I read them and reread them, then read them again. I wanted to be Laura. I wanted to stand where she stood. It was my dream to visit all of the Little House sites, Laura’s former homesteads with her family, and I finally visited some of them as an adult. You may laugh, but these trips were just about the only vacations I have ever taken. Forget island paradise. I went to Missouri.

I have no shame. This was, is, and will always be the level of my obsession.
So, you can imagine my glee when I came across “The Little House Cookbook.” Researched and written by Barbara M. Walker, it features more than “100 authentic recipes of classic pioneer food — the food that Laura Ingalls and her family ate as they traveled from the woods of Wisconsin to the Dakota Territory.” … And let’s not forget “Farmer Boy,” Laura’s future husband. That boy had it made in his mother’s New York state kitchen.
Some of the recipes are from a bygone era but well worth trying out today; others are similar to what I sometimes make in my own kitchen. I’ll tackle one soon and let you know how I make out.

Glop


If you’re looking for culinary extravagance, Glop is not for you. It is a simple, comforting down-home medley of flavors, baked in the oven. I refuse to call it a ‘casserole.’ It is Glop, and I love it. 
I’ve been eating Glop for years. The recipe came to me from my friend Bonnie, a wonderful home cook who seriously underestimates the beauty and goodness of Glop. It’s just rice, chicken, sour cream, mushrooms, white wine, onions, oh-so-many good things baked together in the oven, but you’ll want to curl up to a dish of it again and again and again. The Glop is that good.

2 whole chicken breasts
bay leaf, parsley, garlic, any other delights you’d like to taste with your chicken
1 large onion, sliced thin and sauteed in butter
8 mushrooms (baby portobello, button, whatever kind you want; I usually use a lot more than 8, though), sliced and sauteed in butter
1 cup sour cream
1/2 cup white wine (that you would be happy to drink)
1 can cream of mushroom soup (the most glamourous of ingredients)
1 cup long grain rice (uncooked)
salt and pepper (to taste)
Cook chicken with herbs and garlic (boil, roast, whatever you want); let it cool, then debone and shred chicken into bite-size pieces. Combine chicken with all of the other ingredients, mixing thoroughly. Put in greased baking dish and bake covered at 350 degrees for 1 1/2 hours. 
(P.S. I usually double the recipe so that I have a bunch to freeze.)

So. … I tried.

Don’t mind the glare. Or the flour dust on the shelf.

We were surrounded. For weeks. By cookies. Crisp and buttery. Rich and fudge-y. Crumbly and chewy. Gloriously fattening. They were all there, for a long time. After New Year’s I thought I wouldn’t want to see, let alone bake, another cookie for a while. Six whole days went by before I decided I needed one of them (really, I thought I could go longer). That’s when I made these chubbers: Bittersweet Chocolate Chunk Cookies.