Coconut Love

Oatmeal Cookies with Toasted Coconut and Bittersweet Chocolate

I can’t seem to get enough of coconut these days, as evidenced by my recent posts for Pineapple Coconut Cream Pie and Love-My-Butt-the-Way-It-Is Bars — and by several extreme closeups of the stuff found on my digital camera.

I lust it.

And I lust it even more toasted (the coconut, that is, not me).

A pile of goodness, ready to be folded into oatmeal cookie dough.

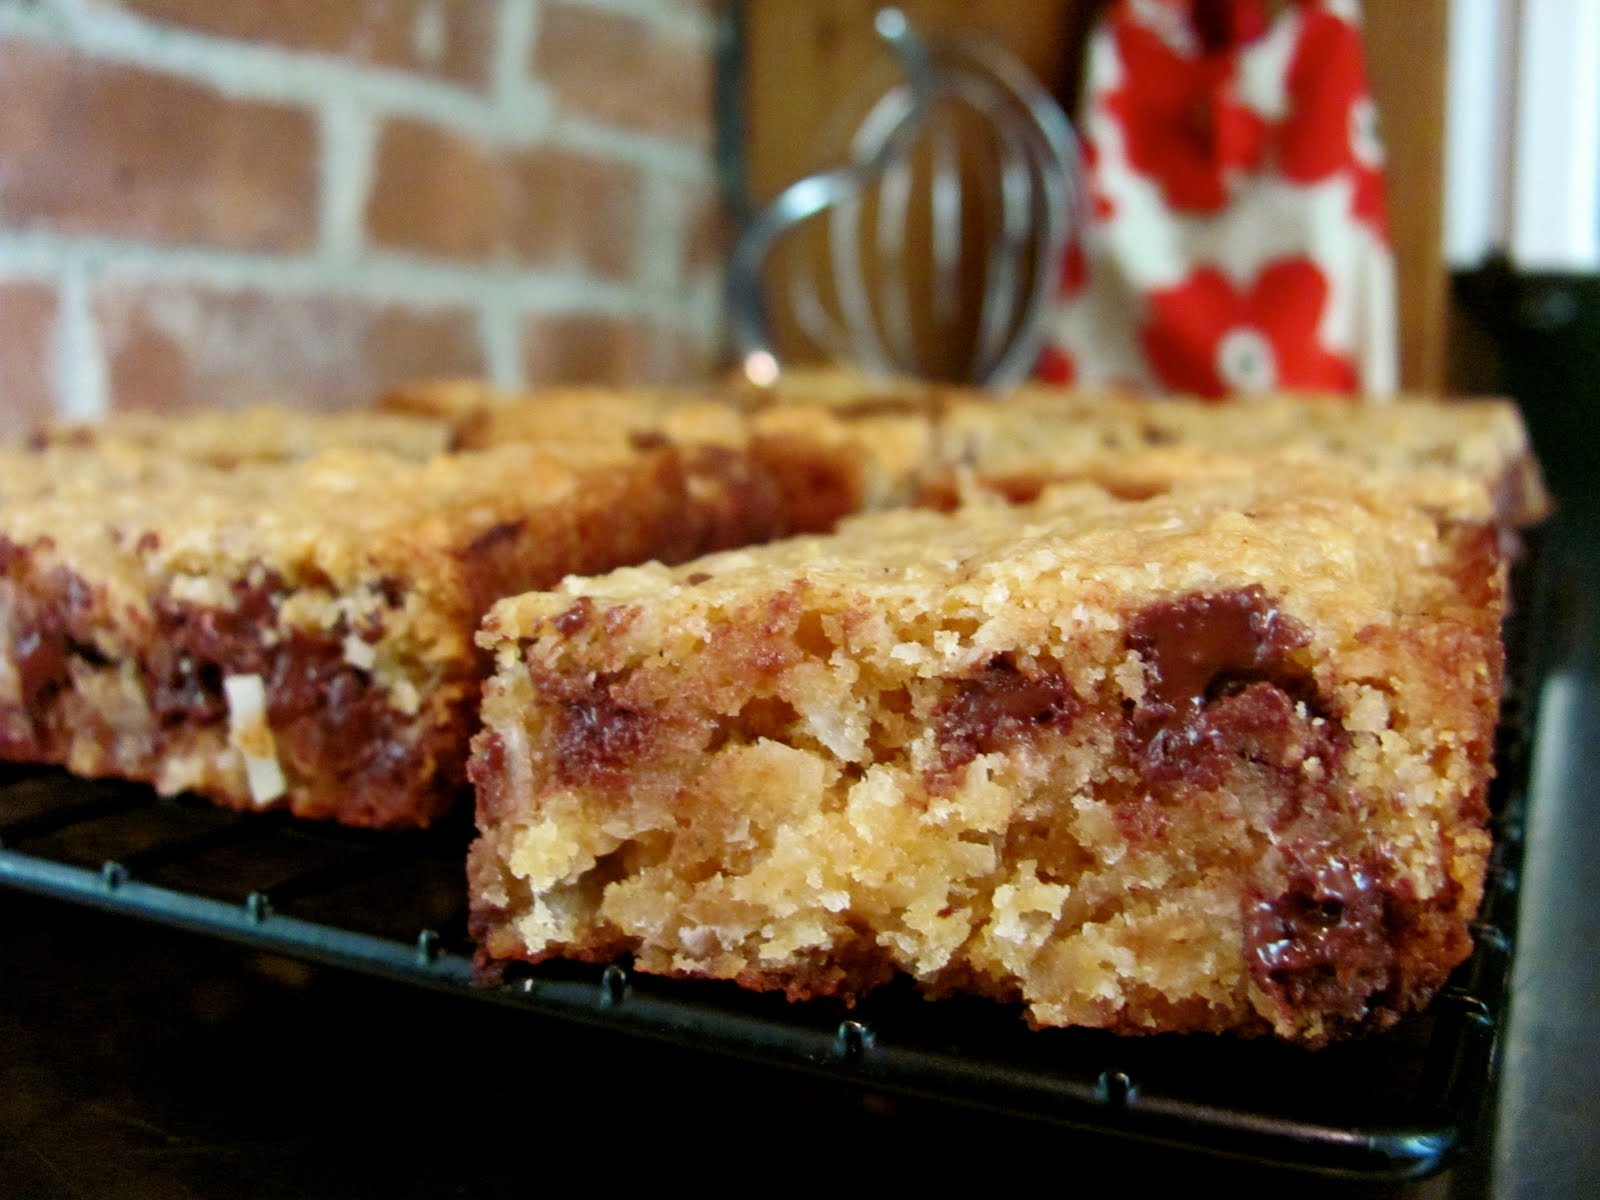
So, given my lack of self-control when it comes to the white stuff and my surplus of old-fashioned rolled oats, I decided oatmeal cookies with toasted coconut were the way to go this week. They baked up chewy (in the middle) and crisp (along the edge) and after downing a few with a glass of cold milk, these swiftly became my favorite cookies. This week, anyway.

Oatmeal Cookies with Toasted Coconut
(adapted from Ghirardelli’s recipe for oatmeal chocolate chip cookies)

1 cup all-purpose flour
1 teaspoon baking soda
1/2 teaspoon salt
1 teaspoon cinnamon
1/4 teaspoon nutmeg

1 cup (2 sticks) butter, softened
3/4 cup packed brown sugar
1/2 granulated sugar
1 large egg, lightly beaten
1 1/2 teaspoons vanilla
3 cups old-fashioned rolled oats
2 cups bittersweet chocolate chunks
1 1/2 cups flaked coconut, toasted*

Preheat oven to 375 degrees.

In small bowl, whisk together flour, baking soda, spices and salt. Set aside.

In large bowl, cream butter and sugars until light and fluffy. Mix in vanilla and egg until just combined.

Add flour mixture, mixing to combine.

Stir in oats.

Fold in chocolate chips.

Gently fold in toasted coconut.

Drop by rounded tablespoon — I use a 1-inch scoop (I like ’em jumbo and uniformly jumbo at that) — onto ungreased, cool-to-the-touch cookie sheets.

Dough love. (Truth be told, I give the dough balls a smoosh with the back of the scoop after placing on the cookie sheet.)

Bake for 8-11 minutes, depending on how chewy or crispy you like your cookies.

Let cool for about a minute on the cookie sheets, then transfer to wire racks to cool completely.

Eat.

(*To toast coconut, spread flakes evenly on ungreased cookie sheet and bake in 375-degree oven for about 5 minutes, giving the flakes a toss every couple of minutes. Let cool completely before using in recipe.)

Granny-esque Chewy Chocolate Cookies

Chewy Chocolate Cookies (the way my grandmother never made them)

I woke up today wanting to bake (and eat) a chewy chocolate cookie reminiscent of the old-fashioned, made-by-grandma, touch-of-molasses, sugared-exterior cookie of my imagination. See, neither of my grannies nor my mom ever made me chocolate cookies like these, but I know I had them somewhere.
So, with my mom’s chewy ginger cookie as a guide, I created my own darkly satisfying Chewy Chocolate Cookies, the ones I will make for the wee ones when I am a granny — or a great auntie, at least.
Chewy Chocolate Cookies
2 cups all-purpose flour
1/2 cup unsweetened cocoa
2 teaspoons baking soda
1/2 teaspoon salt
1/2 cup (1 stick) butter, softened
3/4 cup vegetable shortening (don’t usually partake of the stuff, but it works well here)
1 cup brown sugar
1/4 cup molasses
1 egg
1 teaspoon vanilla
4 ounces bittersweet chocolate, chopped to within an inch of its life (I massacred a Ghirardelli 70 percent bittersweet baking bar — seriously, you want bits more than chunks)
granulated sugar for rolling
Preheat oven to 350 degrees. Grease cookie sheets.
In small bowl, whisk together flour, cocoa, baking soda and salt. Set aside.
In large bowl, cream butter, shortening and brown sugar. Add molasses and vanilla. Beat in egg.
Add flour mixture in two batches until fully combined.
Stir in massacred bittersweet chocolate.
Form 1-inch (or so) balls of dough and roll them in granulated sugar. 
Place dough balls on prepared cookie sheets, leaving them room to groove.
Bake in preheated 350-degree oven for about 10 minutes.
Remove from oven and leave cookies on sheets for about a minute before transferring cookies to wire racks to cool completely.
Have a cookie binge, even if you told yourself you wouldn’t.

Love-My-Butt-the-Way-It-Is Bars

Coconut Chocolate Chip Bars (AKA Love-My-Butt-the-Way-It-Is Bars)

A word before we begin: if you’re having a Fat Day, a Beat-Myself-Up-Because-I-Am-Less-Than-Perfect Day or an I-Miss-My-Eating-Disorder Day, do me and yourself a favor and don’t make Coconut Chocolate Chip Bars. These bars don’t care about your insecurities or your body-image issues. They don’t care that you count fat grams or that you “try to eat healthy.” They only care about gobs of butter and cupfuls of toasted coconut and chocolate chip-age, which they know you will be hard-pressed to steer clear of …
On the other hand, these rich little numbers may be exactly what you need to snap out of your guilt-ridden funk. After all, food isn’t the enemy. Go the everything-in-moderation route and treat yourself once in a while.
Coconut Chocolate Chip Bars
(Cookie of the Week)
2 cups all-purpose flour
1/4 teaspoon salt (if using unsalted butter, use 1/2 teaspoon salt)
1 teaspoon baking powder
1/2 teaspoon cinnamon
1 cup butter, softened
1 1/2 cups light brown sugar, packed
2 1/2 teaspoons vanilla
2 eggs, lightly beaten
2 cups sweet, flaked coconut
2 cups semisweet or bittersweet chocolate chips
Preheat oven to 325 degrees. Grease a 9×13-inch pan and dust with cocoa powder.

Spread flaked coconut on another (ungreased) baking sheet. Toast in oven for 4-5 minutes, giving flakes a stir every 2 minutes or so, until light golden. Remove from oven and set aside to cool.
Turn oven up to 350 degrees.

In small bowl, whisk together flour, salt, baking powder and cinnamon. Set aside.

In large bowl, cream butter and sugar until fluffy. Add eggs and vanilla, mixing until just combined. Add dry ingredients in 2 batches until fully incorporated.

Stir in chocolate chips and cooled, toasted coconut. (Feel free to add nuts as well. I live with a no-nuts man, so I refrained.)

Spread dough into prepared pan and bake at 350 degrees for 25-28 minutes. Bars are fully cooked when inserted knife comes out clean.

Transfer pan to wire rack to cool completely. Cut into bars.

Have at least one gallon of milk on hand when you gobble up these chewy, gooey Coconut Chocolate Chip Bars.

The bigger your thumb, the better

Strawberry Thumbprints: Fruity jam loves a buttery cookie.

The title of this post is a tad misleading: I use a 1/2 teaspoon measure, not my thumb, to form the wells in my Strawberry Thumbprints. The choice is yours. I started out using my thumb — it did a fine job — but I like the uniformity achieved with a measuring spoon.
Anyway, thumb ramblings aside, you may have picked up on the fact that this is Love & Scraps’ Cookie of the Week, late as usual but still lovable. 
Strawberry Thumbprints are one of my all-time favorites: buttery cookie dough with a splash of citrus is the perfect complement to a fruity filling. I was in the mood for strawberry this go-round, but raspberry is also delicious in this cookie. Around the holidays, I like to add ground nuts to the dough. But I’ll tell you more about that, well … around the holidays.
Strawberry Thumbprints
1 cup (2 sticks) unsalted butter, softened
2/3 cup granulated sugar
2 large egg yolks
1 teaspoon vanilla extract
1 tablespoon orange juice
1 tablespoon orange zest (optional, but it makes a huge difference — be sure it is finely grated)
2 1/4 cups all-purpose flour
1 teaspoon baking powder
1/2 teaspoon salt (if using salted butter, use 1/4 teaspoon salt)
for filling, thoroughly mix the following two ingredients:
1/3 cup strawberry jam
1 tablespoon orange juice
Preheat oven to 350 degrees. Lightly grease two baking sheets.
In small bowl, whisk together dry ingredients (flour, salt and baking powder). Set aside.
In large mixing bowl, cream butter and sugar until fluffy.
Add vanilla, 1 tablespoon OJ, orange zest (if using) and egg yolks, and mix until incorporated.
Stir in dry ingredients a cup or so at a time. Do not over-mix dough.
Pinch off 1-inch nuggets of dough and gently shape into balls between the palms of your hands. Evenly space balls on prepared cookie sheets, 12 to a sheet.
Using your clean thumb OR a 1/2-teaspoon measure, form a well in the center of each ball. (Don’t get too crazy. You don’t want to press down too hard and end up touching bottom or with crack-riddled cookies [you know, like some of mine].)
Fill each well with about 1/4 teaspoon of jam mixture.
Bake cookies in preheated oven for about 18-20 minutes, rotating trays at about the 9-minute mark.
Cool cookies on wire racks.
Eat ’em up.

Doin' the Doodle

Cookie of the Week: Installment 4 
Cinnamon-sugary Snickerdoodles with a hint of nutmeg.


I hesitated before embarking on my Cookie of the Week series, mostly because I rightly suspected that I would screw up the rotation. This Cookie of the Week post is evidence of that — it is about five days late — but I hope you find it worth the wait.

For its name alone, the Snickerdoodle is one of my favorite cookies. But there is more to this cookie than a cool, goofy name. Snickerdoodles have history. They are a cookie jar classic. Some say their roots can be traced back to Germany (to the “schneckennudeln,” or snail dumpling). Hmmmm. I prefer Snickerdoodle to snail dumpling. … Anyway, they are the first cookies I learned to bake in my mother’s kitchen, and they quickly became my go-to cookies (the ingredient list is short and simple, and the goods are always on hand).

Snickerdoodles are basically sugar cookies that take a tumble in cinnamon sugar before hitting the oven. I add nutmeg to the dough to further add to that homey, big-hug, old-fashioned sugar cookie taste.

Snickerdoodle dough balls: post-cinnamon sugar tumble.

Snickerdoodles
1 cup (2 sticks) butter, softened
1 1/2 cups granulated sugar
2 large eggs
1 teaspoon vanilla
2 3/4 cups all-purpose flour
2 teaspoons cream of tartar
1 teaspoon baking soda
1/2 teaspoon nutmeg
1/4-1/2 teaspoon salt
cinnamon sugar mixture (for rolling dough balls — I used a couple of tablespoons of sugar and a couple of teaspoons of ground cinnamon)
Preheat oven to 350 degrees.
In small bowl, whisk together flour, cream of tartar, baking soda, salt and nutmeg. Set aside.
Beat butter and sugar in large bowl until light and fluffy. 
Mix in eggs and vanilla.
Add flour combo and mix until thoroughly combined.
Scoop dough by tablespoonfuls (or use a handy 1 1/4-inch scoop, like I did), form into balls and roll in cinnamon sugar mixture. 
Place balls on ungreased, cool-to-the-touch cookie sheets.
Bake in preheated oven for 10-12 minutes.
Leave cookies on sheets to cool for about a minute before transferring to wire racks to cool completely.
(Note: I ended up with about 2 1/2 dozen cookies, but my scoops tend to lean toward the fat and full. Feel free to make them a bit smaller if you’re looking for greater yield.)

Who Doesn't Love a Hybrid?

Cookie of the Week: Installment 3

Banana Oatmeal White Chocolate Chunkers are perfect for the lunchbox.

Bananas are a staple in this house. I may have mentioned this a time or two, or 40, before, but it really bears repeating. We eat them just as they are and in smoothies, but there are usually a few overripe ones kicking around. I show them no mercy. It’s to the oven for those slightly-past-their-prime bananas, to be gobbled up in muffins, quick bread and, today, cookies. (See the link in the index at left, cleverly titled “banana,” for older banana-related posts.)
These cookies, the third installment in my we’ll-see-how-long-this-lasts Cookie of the Week series, reflect my love of banana bread and chewy oatmeal cookies. They also reflect my freaked-out realization this morning that we are out of eggs. 
Eggs. Of all things. 
Anyway, I improvised, and they turned out as I had hoped. A little chewy and oat-riddled. A little banana bread-y. A lot yummy.
Banana Oatmeal White Chocolate Chunkers
2 medium very ripe bananas, mashed
1 cup (2 sticks) butter, softened
1 cup brown sugar, packed
1/2 cup granulated sugar
2 teaspoons pure vanilla
2 cups all-purpose flour
1 1/2 teaspoons ground cinnamon
3/4 teaspoon ground nutmeg
1/4 teaspoon ground cloves
3/4 teaspoon salt
1/4 cup boiling water
1 teaspoon baking soda
4 cups rolled oats
12 ounces white chocolate, roughly chopped (I used 3 Ghirardelli bars)
Preheat oven to 375 degrees.
In small bowl, whisk together flour, spices and salt. Set aside.
In large bowl, cream butter and sugars until fluffy. Add mashed banana and vanilla, beating well. Add flour mixture, but don’t mix in just yet.
Dissolve baking soda in water. Add this concoction with flour mixture to bowl with the rest of the party, and stir to combine.
Stir in rolled oats and white chocolate chunks.
Drop by rounded tablespoonfuls (or use a scoop, like I did) onto cookie sheets. Flatten mounds of dough with back of spoon/scoop.
Bake in preheated oven for 9-10 minutes. Leave cookies to cool on sheet for about a minute before transferring to wire racks to cool completely.

Sunshine in a Pan

Cookie of the Week: Installment 2


According to my sources, it is American Chocolate Week. That’s joyful news, yes, but, well, it’s always Chocolate Week around here, so I have decided to go in a different direction. A brighter, sunshine-y direction. A Mom’s Lemon Bars direction.

That’s not to say you won’t find me celebrating the wonders of chocolate this week (or anytime, for that matter). And if you’re reading this and disappointed that I am not highlighting chocolate in all of its decadent glory on this particular day, in this particular post, get thee to the index’s “chocolate” link at left (or click here) and find your pleasure among the recipes for Triple Chocolate Babycakes, Chewy Chocolate Chunk Cookies or, if you have some time on your hands, Mile-High Chocolate Cream Pie.

But for me, today, it’s about lemons. The weather has been dreary in Vermont this week (more snow, sleet and other anti-spring conditions), and I need a bar cookie with a burst of citrus to get me out of my funk. It also helps that the base of this cookie resembles shortbread, thanks to two sticks of butter.

I bake the bars only about once a year, but there is no good reason for this. They’re delicious, easy to make, and remind me of my mother — who gave me the recipe and also (inexplicably) made them only once a year.


Mom’s Lemon Bars
2 cups all-purpose flour
1 cup confectioners’ sugar
1/4 teaspoon salt
1 cup butter (2 sticks)

1 1/2 cups granulated sugar
4 large eggs
juice of 3-4 lemons, about 1/2 cup (3 worked for me — this time)
2 teaspoons lemon zest (optional)
1/2 teaspoon baking powder
2 tablespoons all-purpose flour

confectioners’ sugar to dust the top

Preheat oven to 350 degrees. Grease a 9×13-inch pan.

Beat butter, 2 cups flour, confectioners’ sugar and salt in large bowl until crumbly. Press this bumpy mixture into prepared pan as evenly as you can to form the base for the bars.

Buttery base is ready for its first go in the oven.

Bake base in preheated oven for about 20 minutes, until golden brown around the edges.

During those 20 minutes, make the filling: Whisk eggs with granulated sugar, fresh lemon juice, zest (if using), baking powder and remaining 2 tablespoons flour. Whisk until thoroughly combined.

Lemons await juicing.

When the base is ready, pour filling over top and return to the oven, baking another 15-20 minutes.

Dust with confectioners’ sugar and leave bars to cool completely on wire rack.

Cut into squares and enjoy the taste of sunshine (now, you’ll want to use a knife with some heft to it to press down through the base; these aren’t tricky to cut, but it’s easy to make the mistake of not slicing all the way through the layers; also, lift them out with a metal spatula). I like to store these in the fridge, but it’s not necessary.

Bright, tart lemon filling loves a dense, buttery cookie crust.

In the Cookie Jar: Back to Basics

Chewy Chocolate Chunk Cookies with bittersweet and milk chocolates

“Sometimes me think what is love, and then me think love is what last cookie is for. Me give up the last cookie for you.” — Cookie Monster
Oh, Cookie Monster. You are right about so many things.
Anyway, I’ve decided it’s high time I feature a cookie of the week here at Love & Scraps, and I figure there is nothing more appropriate for the first installment than classic Chewy Chocolate Chunk Cookies. These cookies are simple, but sublime, and riddled with both bittersweet and milk chocolate chunk-age.
Now, chocolate chip cookie recipes are about as basic as it gets. They are everywhere, much like Ubiquitous Banana Bread. I am not reinventing the wheel here, merely sharing my method for making one of my household’s cookie jar / lunchbox staples.

Chewy Chocolate Chunk Cookies
1 cup (2 sticks) butter, softened
1 cup brown sugar, packed
1/2 cup granulated sugar
1 tablespoon vanilla
2 large eggs
2 1/4 cups all-purpose flour
1 teaspoon baking soda
3/4 teaspoon salt (I like a bit more salt than is standard in most CCC recipes. If using unsalted butter, use 1 teaspoon salt.)
1 1/4 cups bittersweet chocolate chunks, or chips (I use a 60-70 percent cacao bar of chocolate, roughly chopped.)
1 cup milk chocolate chunks, or chips (I like the kid-pleasing sweetness once in a while.)

Preheat oven to 375 degrees. Have 2 cookie sheets at the ready (do not grease the sheets).

Whisk together flour, baking soda and salt. Set aside.

Cream butter and sugars until fluffy. Mix in vanilla and eggs, one at a time, until incorporated.

Work in flour mixture, in two or three batches, until combined. Don’t over-mix.

Stir in chocolate chunks, milk and bittersweet.

Drop cookie dough by hefty tablespoonfuls onto ungreased, cool-to-the-touch cookie sheets. (I use a scoop for this purpose that measures 1 1/2 inches in diameter. I like my cookies relatively uniform in size. Plus, they’ll bake more evenly if basically the same size.) Smoosh down dough a bit with the back of the spoon/scoop. Make sure cookies are somewhat evenly spaced with room to groove (we don’t want any run-ins).

Note: It may be tempting to slap dough onto trays relatively fresh from the oven, to keep things moving, but don’t do it. A hot tray messes with perfection.

Bake in preheated oven for 9 to 11 minutes, rotating tray at about the 6-minute mark. Cookies are done when set and golden brown around the edges but still a tad wet-looking in the middle. Remove from oven but leave on the cookie sheet for about a minute, then transfer cookies to wire rack to cool.